- Create a 3D and a 2D block of the door/window for the 3D Model View and for the Plan View reprentations.
Notes:- The 3D block must take its base point at its lower-center position. The 2D block must take its base point at its center position.
- Geometry must be aligned with the X axis when creating the block.
- Draw the boundary of the door/window (any closed planar curve should work)
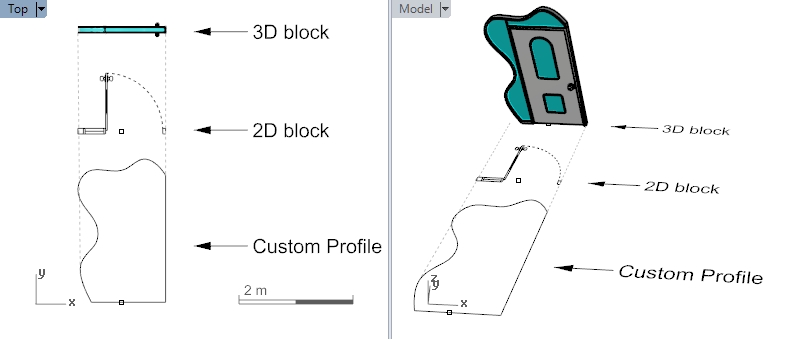
- With the “Create Profile from Curve” command _vaProfileFromCurve
 , create a custom profile using the boundary drawn in step 2.
 - Right-click on the door icon to execute the “Edit Door/Window Styles” option (or run the vaDoorStyles/vaWindowStyles command).
- Right-click on the Door Styles folder > New > Door style.
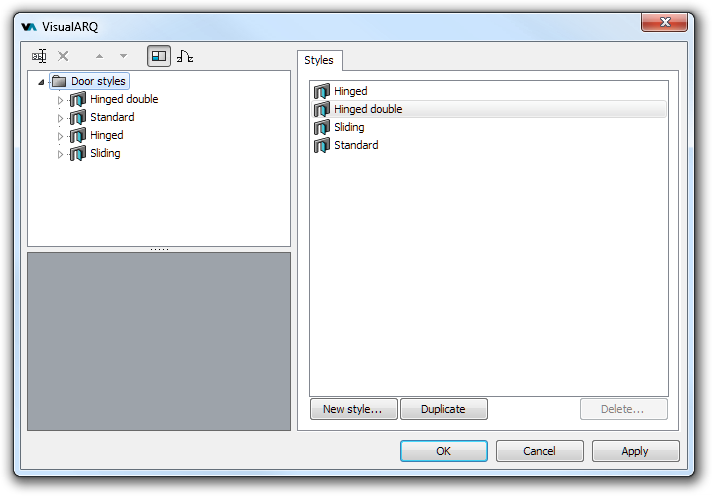
- The Door Style Wizard will open and will ask you to specify the style name, and to choose a profile from a list.
Find your custom-profile in the list and select it.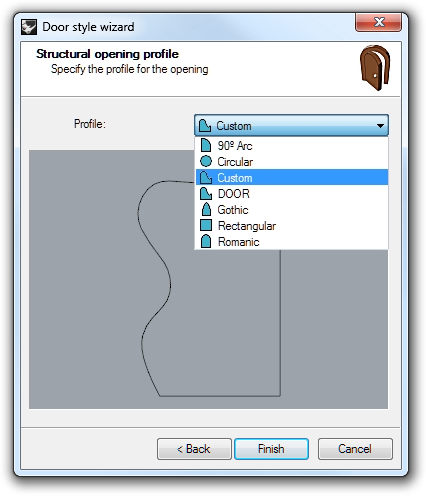
- Click “Next” (skip the dialogs to define “Standard size”, “Frame”, “Stop” and “Leaves”) until
the “Custom blocks” option appears. Check the boxes “Use a custom block in model"
and "Use a custom block in plan view”, and then assign them the 3D/2D blocks that you created
before. If you don’t assign any 3D or 2D block to the model and 2D representation, the door/window will be shown
based on its component parameters.

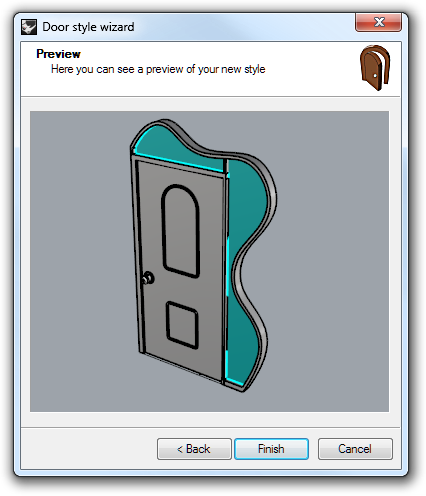
- Click “Next” and “Finish” to see the resulting custom door.
NOTE: This custom-door/window won’t be parametric. You need to draw it with the appropriate dimensions. If you wish to modify it, you need to edit the original block, taking into account that the opening custom profile may change and the block base point might be moved away from the bottom center point of the block, which may cause a mismatch between the door/window and the opening in the wall. If this happens, edit the block and make sure you select its bottom center point as the block base point. Edit the custom profile and save it as a new profile with the vaProfileFromCurves command, as described in step 3. Open the door/window styles dialog and assign the new profile to the door/window style.
It is possible to create custom parametric doors or windows from Grasshopper styles. You can find some examples here.