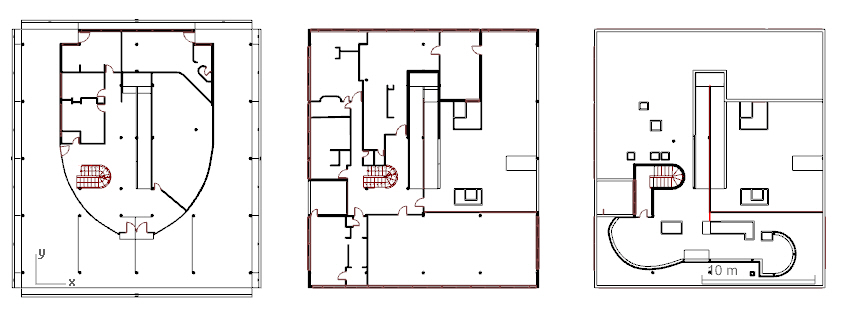
Create Plan Views
Create a Plan View
The _vaPlanView command ![]() , creates a 2D drawing that represents the 3D objects projected on a horizontal plane.
, creates a 2D drawing that represents the 3D objects projected on a horizontal plane.
- Run the _vaPlanView command
 or click on the Create Plan View icon in the Documentation toolbar to insert a specific Floor Plan View in the model.
 - From the Create Plan View insert dialog box, select the Plan View style you wish to use. Plan view styles define the attributes of plan views, such as their text font or size. (Run the _vaPlanViewStyles command to edit Plan Views.)
- Select the level you wish to represent in 2D horizontal plan.
- Define the boundary area of the objects to include in the Plan View. You can either pick the two opposite corners of a rectangular boundary area, or select the FromCurve option in the command line and pick a closed and planar curve (previously created) that will define the area of the objects displayed in the Plan View.
- Specify an insertion point. Left click anywhere on the screen to insert the Plan View.
Repeat the same steps to insert the other two floor plan views in the model. These Plan Views have the attributes of the 3D objects they represent.
You can edit the Plan views from the Object Properties panel ![]() and change any of the following parameters:
and change any of the following parameters:
- Style
- Level to display
- View depth: you can enter the depth distance measured from the Cut Plane position of the selected level that will be displayed in the Plan View. There are already some preset options (Level, Level below and Unlimited).
- Title
- Scale
- Auto update
- Show boundary
- Show dimensions: (this option has has been temporarily disabled. It will be recovered in future VisualARQ versions.)
- Tolerance factor: this value determines the level of detail the plan view is generated with. The higher this value is, the less detailed the plan view will be
Note
Since VisualARQ 1.8 Plan Views can be updated after any change on the 3D model. Just select the Plan View object and run the _vaUpdate
command to apply the changes.

Export the floor plan views to AutoCAD
Follow this tip to learn how to export these 2D drawings to AutoCAD in .dwg file format.
