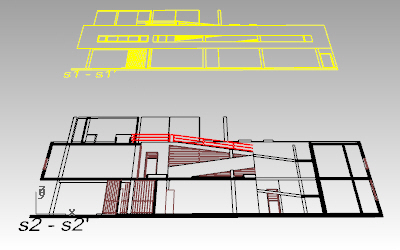
Create 2D Section Views
Create a Section View
The _vaSectionView command ![]() creates a 2D drawing that represents the 3D objects projected on a plane. The section view is created according to the section mark position in the model.
creates a 2D drawing that represents the 3D objects projected on a plane. The section view is created according to the section mark position in the model.

- Run the _vaSectionView
 command to insert a new section view in the model.
 - Specify a Section View style from the insert dialog box.
- Select a section mark.
- Specify an insertion point. Left click anywhere on the screen to insert the section drawing.
The Section View displays all objects included in the section mark area. Turn the section mark control points on ![]() to modify this area.
to modify this area.
The Section View keeps attached to the section mark, as long as you don’t explode it. The 2D drawing has the projection and section attributes of the 3D objects it represents.
Section View Styles
- Run the _vaSectionViewStyles
 to edit and create new section view styles.
 - Click on the New Style… button to create a new style.
- Select the new style just created and edit its attributes. i.e. Text style.
- Click OK to accept changes and exit the dialog.
Now you can change the Section style you inserted in the model for the new one you have created. Select the Section View and change its style from the properties dialog ![]() . You can also change the section view reference text.
. You can also change the section view reference text.
Export the section views to AutoCAD
Check out this tip to learn how to export these 2D drawings to AutoCAD in .dwg file format.
