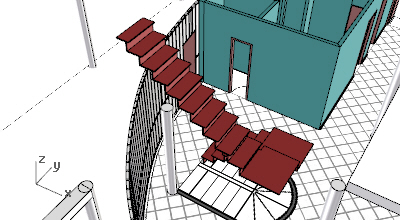
Ground floor stairs
1. Insert a new stair
Switch to the layer where the Ground floor bitmap is located.
- Run the command or click on the Stair icon in the VisualARQ Objects toolbar.
- Select the Stair style you wish to insert and the basic insert options: alignment (select “right”), height (3m), width, step count (17) and tread dimension (0,3m). Use the Rule icon
 along with the Width or the Tread fields to give the stair the proper values according to the bitmap. These values can be edited afterwards.
 - Specify the stair start insert point in the model, according to the bitmap image.
- Specify a new insert point every time the stair turns. A new stair flight is created for every insert point. Right click to finish the command. The stair is now created. It does not matter if it is not exactly like expected. You can adjust the stair shape and properties afterwards.
Note
There is also the option to create spiral stairs, if needed, under the stair toolbar, or from the command line, after running the _vaStair command.
Edit the stair flights and landings
 The parameters of the stair object can be edited from the Stair properties in the Rhino properties panel
 - Open the Stair Properties dialog: double click on the stair object or select the stair and run the command.
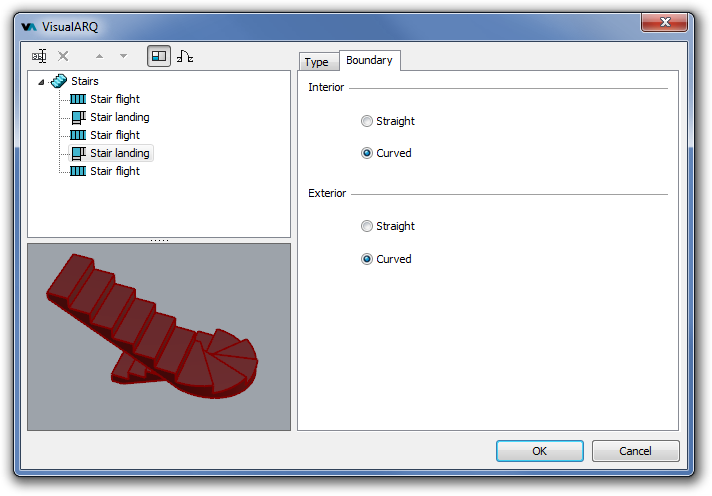
- Edit the stair flights: click on the arrow next to the stair object’s name to view the list of stair flights. Select the second flight and set the interior and exterior boundary (Boundary tab) to “curved”. Do the same with the fourth stair flight.
- Add steps to landings: select the second flight, and from the Type tab, add 3 steps. Do the same with the fourth stair flight.
- Click ENTER button to accept changes and exit the dialog.
2. Create and edit new stair styles
Open the Stair styles dialog box _vaStairStyles to edit one of the existing stair styles or create new ones. These are the options available for defining the stair features:- Type: balanced or not.
- Steps: step tread and riser dimensions. Disable both for the selected style.
- Rules: enable this option to check in its properties dialog if a stair object meets this slope rule.
Back to Index menu

