User Interface and Management
Editing tools
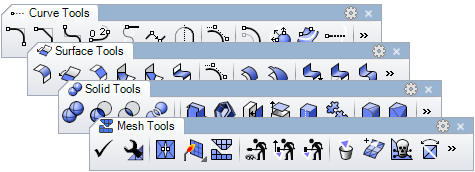
Rhino and VisualARQ provide hundreds of editing tools that make it easy to modify any kind of geometry, no matter how complex it is. Either if you work on 2D drawings or 3D objects, the tools to modify each geometry in the most appropiate way are just right there. Here you can see some of the main editing features:
- Edit tools for any geometry type:
Fillet, chamfer, offset, extend, trim, split, join, boolean union, boolean difference, and more. All these commands adapt to each object type: Curves, Surfaces, Solids, Meshes and VisualARQ objects.
- The Gumball:
The Gumball is a customizable interface widget that allows interactive editing of objects and sub-objects. The Gumball helps you move, rotate and scale the geometry easily.
- Blocks:
Working with blocks lets you create parts libraries, update all instances by modifying a block definition or keeping a smaller model size by using block instances instead of copying identical geometry. Some VisualARQ objects can be created from blocks.
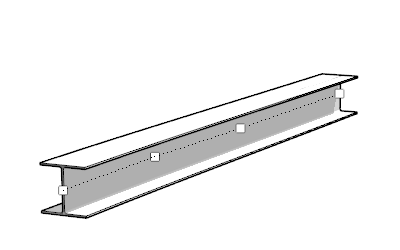
- Control points: curves, surfaces extrusions and meshes can be modified through control points. VisualARQ objects can also be modified through control points, which are the same as the curves they were created from. The number and function of control points are different for each object type.
- Properties panel:
The Properties panel allows you to check and change the information of any Rhino and VisualARQ geometry, such as the Object properties, display and printing Attributes, Section attributes, Materials or Viewport Properties.
- Object styles manager:
This dialog lets you edit the features of VisualARQ object styles. Attributes can be assigned for each component: material, graphic representation, printing properties, display, etc. Wizards guide you to create and edit new architectural objects easily. A preview window shows modifications in real time.
Layers
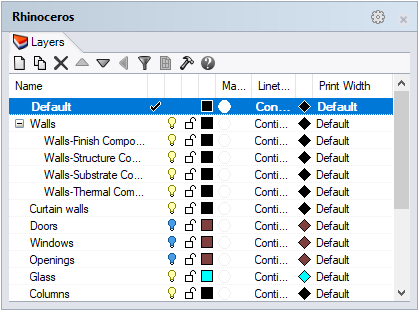
Layers are a way of organizing objects so you can manipulate them all at once or keep track of them in some way. The layer panel gives you tools for managing the layers in your model.
- Layer and sub-layer Properties:
On/off, Lock/Unlock, Color, Material, Linetype, Print Color, Print Width. You can create layers that are subordinated to other layers.
- Layer properties in Page Layouts:
They can be defined by Page Layout and Detail view.
- VisualARQ layers:
When VisualARQ objects are created they are automatically located in a specific layer defined by object type. That makes it easy to hide, show, select them and define common attributes by object type.
- Layer State Manager:
Saves the current state of layers to a file or restores the state of layers from a saved file.
Level Manager
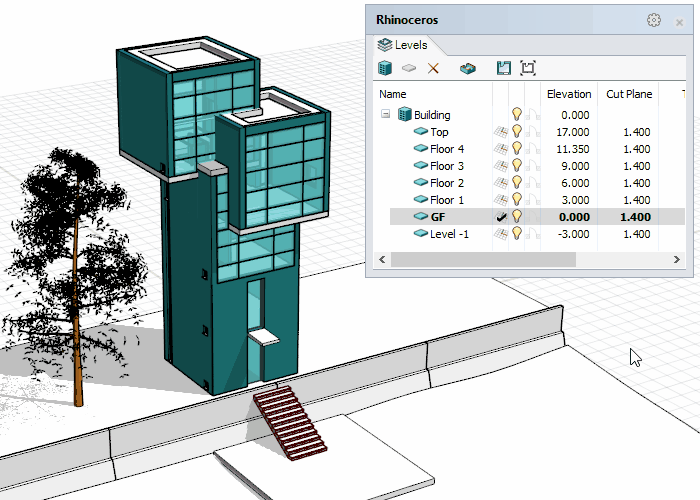
VisualARQ allows you to organize your project in different buildings and levels.
- Work at different levels:
The Level Manager panel allows to create and control new buildings and floors at different levels. From the Level Manager you can have the control of each level CPlane (working plane), display and 2D representation, as well as its elevation and cutting plane values.
- Easy workflow:
Just by double clicking on the level name, the model displays the selected level sectioned and the levels underneath.
- Plan view display:
In the Top viewport, when the Cut Plane is On, VisualARQ objects are shown in their 2D graphic representation.
- Show and hide levels:
Option to enable clipping planes to show and hide levels individually.
- Align view to level and Set plan view to viewport:
With just one click you can put the model in top view, with the cut plane activated by one level, or leave plan views ready for printing.
- Top offset and bottom offset values:
They are used to move the bottom and top limits of a level, determined by the levels elevation, when the next levels underneath or above are hidden.
Section Manager
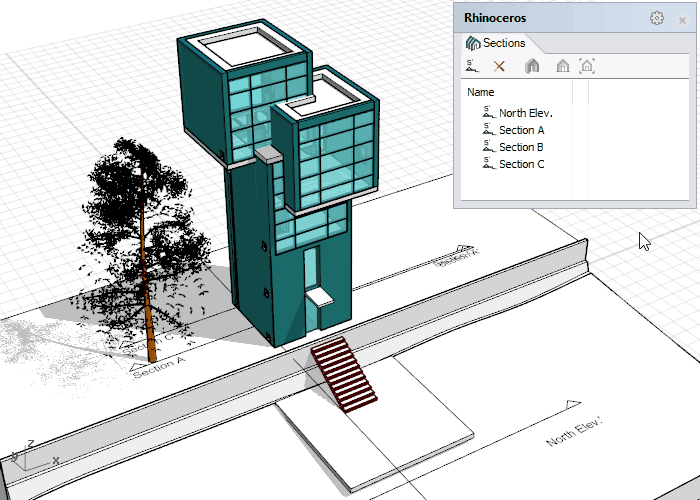
VisualARQ allows you to organize the sections of your project for a better workflow and 2D drawing setup purposes:
- Activate sections:
See the list of section lines in the model and show the model in real-time section activating any of them.
- Easy workflow:
Just by double clicking on a section name in the list to show the model in section in a specific viewport.
- Create new sections:
A button lets you create new section lines in the model.
- Align view to section and Set section view to viewport:
With just one click you can align the view to a section line position, activate the selected section or leave section views ready for printing.
3D and Layout views

Rhino allows you to work from the
Model Space (Standard modeling viewports) or from the Paper Space (
Page Layouts viewports).
- Model viewport:
Displays the Rhino working environment including object display, viewport title, background, construction plane grid and world axis icon. Viewports can be resized, added, deleted or expanded.
- Layout viewport:
Represents the sheet of paper that will be sent to a printer or a file such as PDF. Layouts can include various views of the model and annotations like title blocks and notes. These viewports are accessible on the tabs at the bottom of the modeling area.
- Detail viewports:
Layout viewports contain Detail viewports. Detail viewports contain a view of the model and can be copied, moved and deleted anytime. From the Detail properties you can control the size, scale or locked status.
- Print plan and section views:
VisualARQ levels and sections can be displayed individually per Detail viewport and printed to vector output using the Hidden display mode.
Easy user interface
Rhino and VisualARQ interface, toolbars and dialogs are meant to be intuitive and easy to use. In addition, most of the interface and toolbar settings are fully customizable by the user preferences.
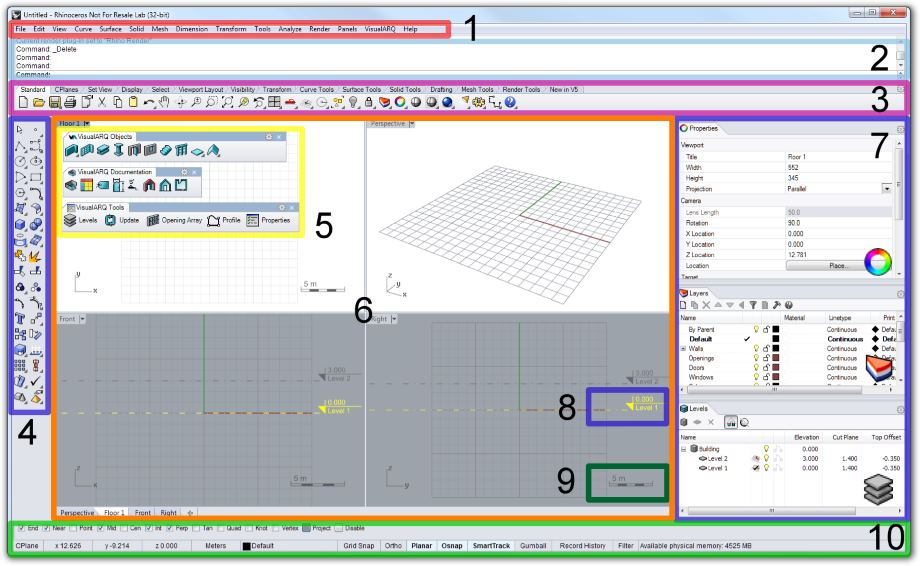
- 1. Drop-down menu: groups all Rhino and VisualARQ commands by function.
- 2. Command line and command history window: displays prompts for command actions, allows typing command names and options.
- 3 and 4. Toolbars: they contain graphical icons to run commands. Toolbars and icons are fully customizable. They can be arranged in tabs (3), docked aside (4) or float over the interface.
- 5. VisualARQ toolbars: VisualARQ commands are arranged in 3 toolbars: Architectural objects, Documentation tools and Other tools. They behave as any other Rhino toolbar.
- 6. Viewports: displays the Rhino working environment including object display, viewport title, background, construction plane grid and world axis icon. Viewport sizes and settings can be easily changed and customized. New viewports can be added, float over the interface and be shown in perspective or parallel projection. The viewport tabs at the bottom manage multiple-page layout style viewports along with standard modeling viewports.
- 7. Properties and editor dialogs: these dialogs can be docked at the viewport sides, arranged in tabs and float over the interface.
- 8. Level Elevation references: they specify the elevation of the existing VisualARQ levels in the document, in the Front and Side viewports.
- 9. Scale icon: this dynamic icon displays the model scale according to the zoom in the current viewport. It only appears in the viewports with parallel projection views.
- 10. Osnap toolbar and status bar: the osnap toolbar contains persistent object snap toggles. The status bar displays the current coordinate system, the current location and delta of the cursor, and the status bar panes.
Custom templates
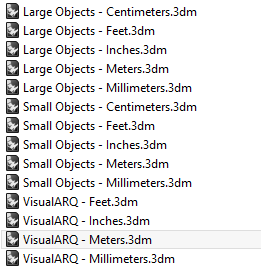
Rhino and VisualARQ provide different templates (in metric and imperial unit systems) which bring an important number of advantages for BIM workflows and organization methods:
- VisualARQ templates:
VisualARQ templates include the full library of parametric object styles which already have some attributes assigned. They also come with a building and a level already created.
- Fully customizable:
Templates are fully customizable. These are some of the parameters that the user can adjust for a custom template: Object styles, Level Manager settings, Layer settings, Title blocks, Page Layouts, Drafting attributes for documentation drawings, Materials, Graphics and IFC schemes
This tip shows you how to create a custom VisualARQ template.


