Exercise 1. Create a wall
1. Create a wall:
- 1. Drag a VisualARQ “Wall” component
 onto the Grasshopper canvas. This wall component has two inputs:
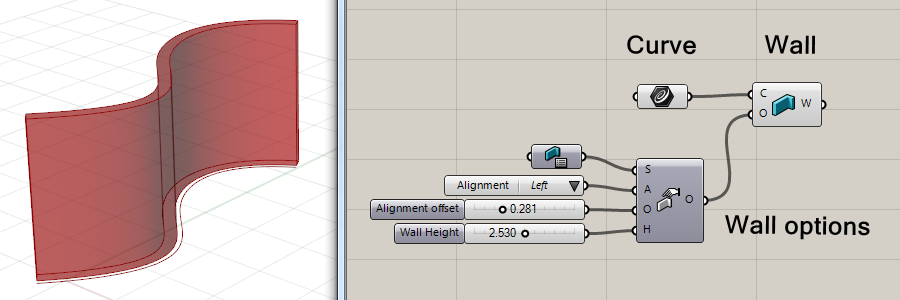
- C: Wall path curve. It must be an open and planar curve.
- O: Options to specify all wall parameters.
- 2. Assign a curve into the wall C input. There are different ways to do that since the curve or curves can be created in Grasshopper or in Rhino.
- a: Curves generated from Grasshopper. Just plug them into the C input of the Wall component.
- b: Curves created in Rhino:
- Right-click on the C input of the Wall component and choose the “Set one curve” or “Set Multiple Curves” option from the list.
- Drag a Curve Param (from the Params tab) on the Canvas and plug it in the C input of the Wall. This Curve Param will be displayed in orange color as long as it has no curves attached. Right click on it and choose the “Set one curve” or “Set multiple curves” option from the list. Grasshopper will be hidden until you select a curve (or curves) in the model.
Remember that in both cases the curves must be planar and open, otherwise the wall(s) won’t be generated.
2. Define the wall parameters:
- 1. Drag a Wall Options component
 onto the Grasshopper canvas. This component has different inputs which define the wall parameters.
 - 2. Plug the Wall Options O output into the Wall component O input.
- 3. Set the different Wall Options:
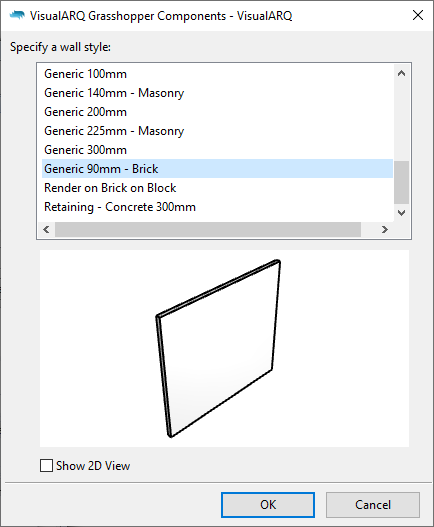
- (S) Wall Style:
 You can drag a Wall Style component onto the canvas, plug it into the S input of the Wall Options. This Wall Style component has a standard wall style assigned by default. To assign a different wall style, right click on this component and select the “Set one Wall Style” option from the list. Grasshopper will be hidden until you select a wall style from the list displayed in the new pop-up dialog. This list shows the existing wall styles available in the Rhino document you are working on.
 - (A) Wall Alignment:
 The Wall Alignment defines the position of the wall based on the direction of its base curve. Drag a Wall Alignment component onto the canvas and plug it into the A input of the Wall Options. Click on the Wall Alignment component and select one of the three options: left, center or right. These alignment positions can be also entered as integer numbers (0=left, 1=center and 2=right) in the A input.
 - (O) Wall Alignment Offset: This value defines the distance of the wall from the direction of its base curve.
- (H) Wall Height: Drag a Number Slider component onto the canvas and plug it into the H input of the Wall Options. When the Wall Options have no number plugged into its H input, or this value is 0, the wall takes the default height by style.
- (S) Wall Style:
3. Bake the wall  :
:
- 1. Since the wall displayed in the model is actually a preview of the wall according to the parameters defined inside Grasshopper, you need to bake it in order to turn it into a workable VisualARQ wall inside Rhino. There are three ways to bake a component in Grasshopper.
- Right click on the Wall component and select the Bake option.
- Click the middle button on the Wall component and select the Bake option.
- Select the Wall component and choose Solution > Bake selected from the menu.
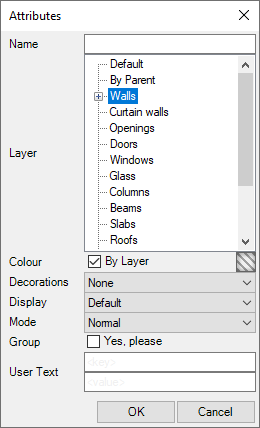
As soon as you bake the wall, the Grasshopper Attributes dialog will be displayed. Choose the output attributes (Name, Layer, Color, etc..) for the wall object you are going to generate in the model.